
The Android location button is a customizable system UI element designed to simplify how you request session-scoped precise location access. By initiating location requests through a direct user action, the button improves user privacy and reduces the friction of repetitive permission dialogs typically encountered with temporary "only this time" grants.
If your app targets Android 17 (API level 37) or later and only contains features that require session-based location access to function, Google Play policy requires you to use the location button. For more details, see the location button policy.
When to use the location button
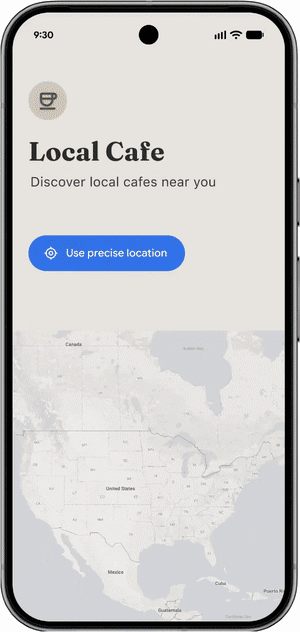
Use the location button for features that require momentary, session-based precise location access. This is ideal for applications that don't require persistent location access and aim to reduce repetitive "Only this time" permission prompts.
Common use cases include:
- "Search near me" functions: Finding nearby hotels, stores, or restaurants.
- Location sharing: Sharing your current location once with friends or family.
- Social media: Check-ins or location tagging.
- Ecommerce: Auto-filling an address for deliveries.
Customize UI
To ensure the button matches your app's aesthetic while remaining recognizable, you can modify the following visual elements:
- Background and icon color scheme.
- Outline style, size, and shape.
- Text labels from a predefined list (e.g., "Use precise location", "Share precise location").

Implement the location button
To integrate the location button, use the Jetpack Library. This library simplifies setup, handles secure rendering on newer platforms, and provides a fallback for apps targeting Android 16 and lower.
Step 1: Declare permissions in the Android Manifest
You must declare standard location permissions along with the dedicated
USE_LOCATION_BUTTON permission required by the system's remote rendering
service.
<?xml version="1.0" encoding="utf-8"?> <!-- Copyright 2026 The Android Open Source Project Licensed under the Apache License, Version 2.0 (the "License"); you may not use this file except in compliance with the License. You may obtain a copy of the License at https://www.apache.org/licenses/LICENSE-2.0 Unless required by applicable law or agreed to in writing, software distributed under the License is distributed on an "AS IS" BASIS, WITHOUT WARRANTIES OR CONDITIONS OF ANY KIND, either express or implied. See the License for the specific language governing permissions and limitations under the License. --> <manifest xmlns:android="http://schemas.android.com/apk/res/android"> <!-- 1. Standard Coarse and Fine Location Permissions --> <uses-permission android:name="android.permission.ACCESS_COARSE_LOCATION" /> <uses-permission android:name="android.permission.ACCESS_FINE_LOCATION" /> <!-- Optional: If your app is only using the location button to access location, you should add the "onlyForLocationButton" flag shown below to your ACCESS_FINE_LOCATION declaration. <uses-permission android:name="android.permission.ACCESS_FINE_LOCATION" android:usesPermissionFlags="onlyForLocationButton"/> Note: Adding this flag restricts your app from accessing the precise location permission via the broader permission, and that users will be required to use the location button in order to share precise location with the app. This is designed to improve user privacy & trust when granting location access. --> <!-- 2. CRITICAL: Required system permission for rendering the LocationButton --> <uses-permission android:name="android.permission.USE_LOCATION_BUTTON" /> <application android:icon="@mipmap/ic_launcher" android:label="LocationButtonSample" android:theme="@style/Theme.PinPoint"> <activity android:name=".MainActivity" android:exported="true"> <intent-filter> <action android:name="android.intent.action.MAIN" /> <category android:name="android.intent.category.LAUNCHER" /> </intent-filter> </activity> </application> </manifest>
Step 2: Implement Kotlin composable
The following is an example implementation of the location button, including examples of using available customization options which can be used to make the UI match the rest of the app.
import androidx.compose.foundation.layout.PaddingValues import androidx.compose.foundation.layout.height import androidx.compose.foundation.layout.width import androidx.compose.runtime.Composable import androidx.compose.ui.graphics.Color import androidx.compose.ui.unit.dp import androidx.core.locationbutton.compose.LocationButton import androidx.core.locationbutton.compose.LocationButtonTextType @Composable fun LocationPermissionScreen(onPermissionGranted: () -> Unit, onPermissionDenied: () -> Unit) { // Renders the secure system-trusted Location Button composable LocationButton( // Callback triggered when the user taps the secure button and makes a decision on the permission dialog onPermissionResult = { isGranted -> if (isGranted) { onPermissionGranted() } else { onPermissionDenied() } }, /* ============================================================================ * VISUAL CUSTOMIZATIONS * Un-comment any of the parameters below to customize the button's aesthetics. * If omitted, the button falls back to secure, high-contrast system defaults. * ============================================================================ */ /* // LABEL TEXT TYPE: // Predefined system strings rendered inside the secure process. // Options: PreciseLocation, UsePreciseLocation, SharePreciseLocation, // NearMyPreciseLocation, or None (for an icon-only button). textType = LocationButtonTextType.UsePreciseLocation, // COLOR PALETTE: // Customize the container background, text label, and icon tint colors. backgroundColor = Color(0xFF00796B), // e.g., Material Teal textColor = Color.White, iconTint = Color(0xFFFFC107), // e.g., Amber icon tint // CORNER RADIUS & SHAPE: // Define the resting corner radius and the morphed radius when pressed. cornerRadius = 24.dp, // Rounded capsule shape pressedCornerRadius = 12.dp, // Morphs to sharper corners on tap // OUTLINE STROKE (BORDERS): // Add a contrasting outline stroke around the button bounds. strokeColor = Color(0xFF004D40), strokeWidth = 2.dp, // INTERACTIVE TOUCH PADDING: // Defines the secure clickable touch target boundary. // Coerced securely by the system between 4.dp and 8.dp. clickablePadding = PaddingValues(6.dp) */ ) }
Step 3: Handle backward compatibility
The Jetpack library automatically handles backward compatibility on lower versions of Android. On devices running Android 16 or lower, the library falls back to a locally rendered component that preserves the customized visual layout but reverts to triggering the standard location permission prompt.
Using this approach, you can take advantage of the benefits of adopting the location button without maintaining a parallel solution for devices running Android 16 or lower.