這項 AI 代理程式具備獨特功能,可協助您使用 Jetpack Compose 實現 Android 應用程式 UI 願景,並遵循 Android 最佳做法。本頁說明如何使用 AI 建立及疊代應用程式 UI。
如要使用 AI 生成 UI,請按照下列一般步驟操作:
建立所需應用程式 UI 的模擬。你可以從設計工具匯出 PNG,甚至使用手繪圖片。
圖 1:應用程式使用者介面的線框稿。 按一下「附加圖片檔案」按鈕,將圖片附加至查詢
 。如果檔案沒有現有預覽畫面,您也可以直接在「預覽」面板中按一下「從螢幕截圖產生程式碼」。
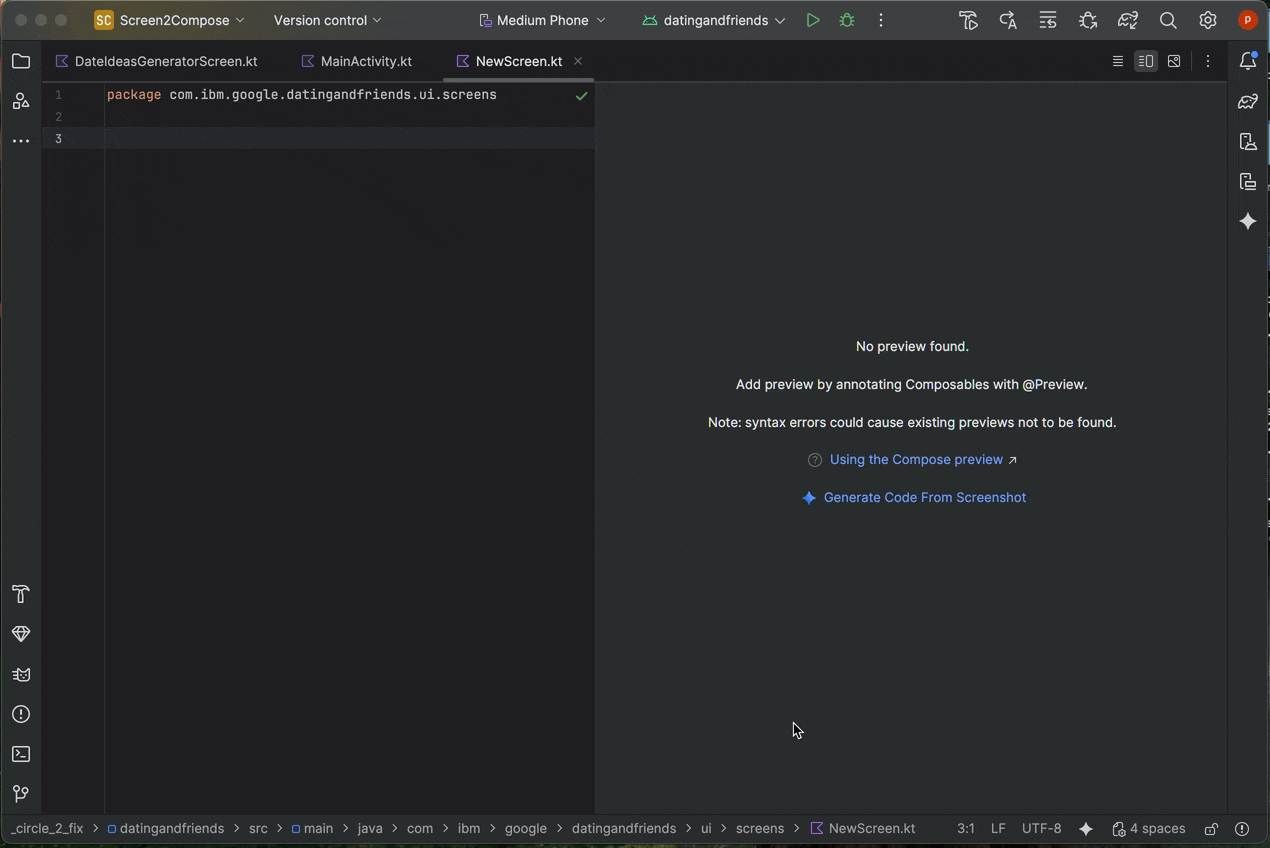
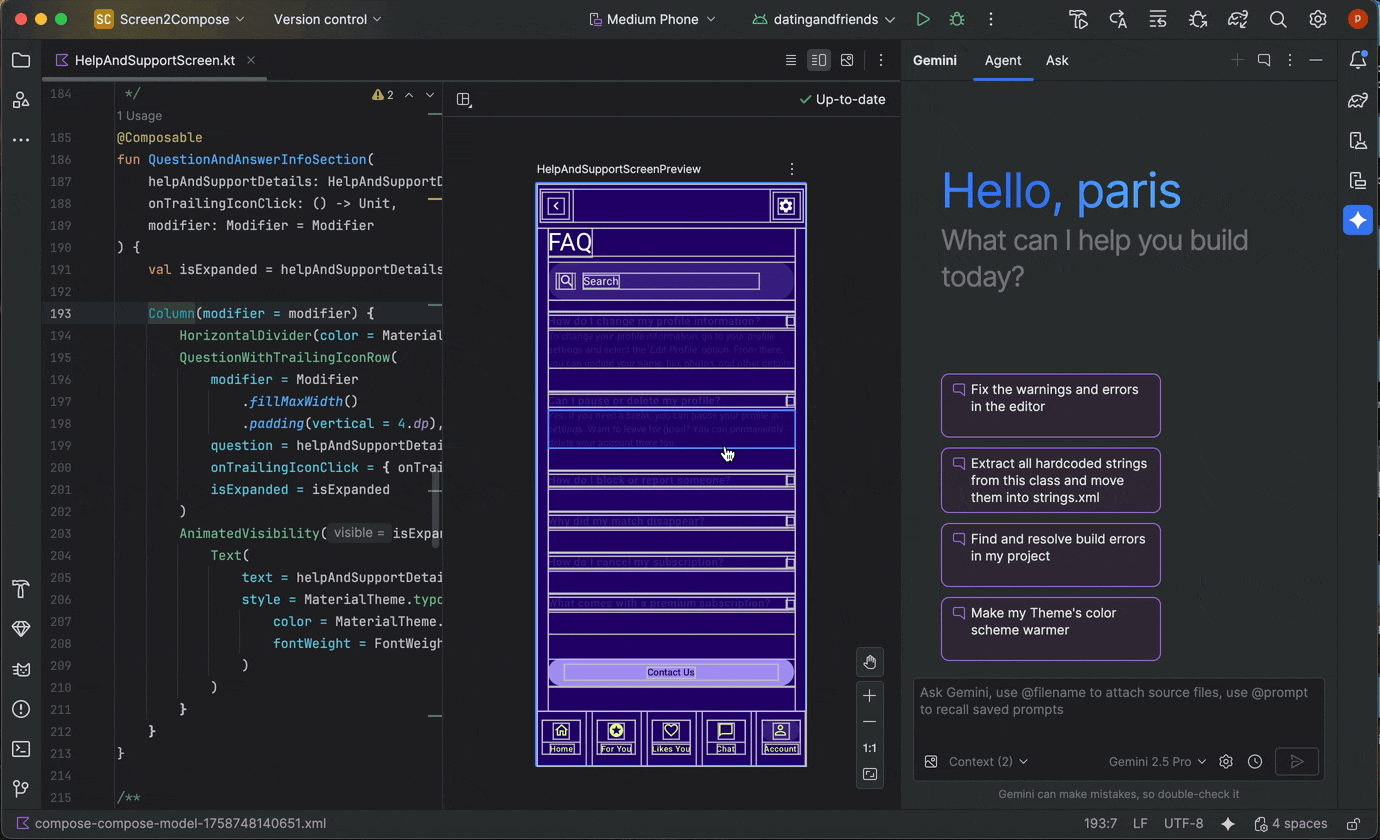
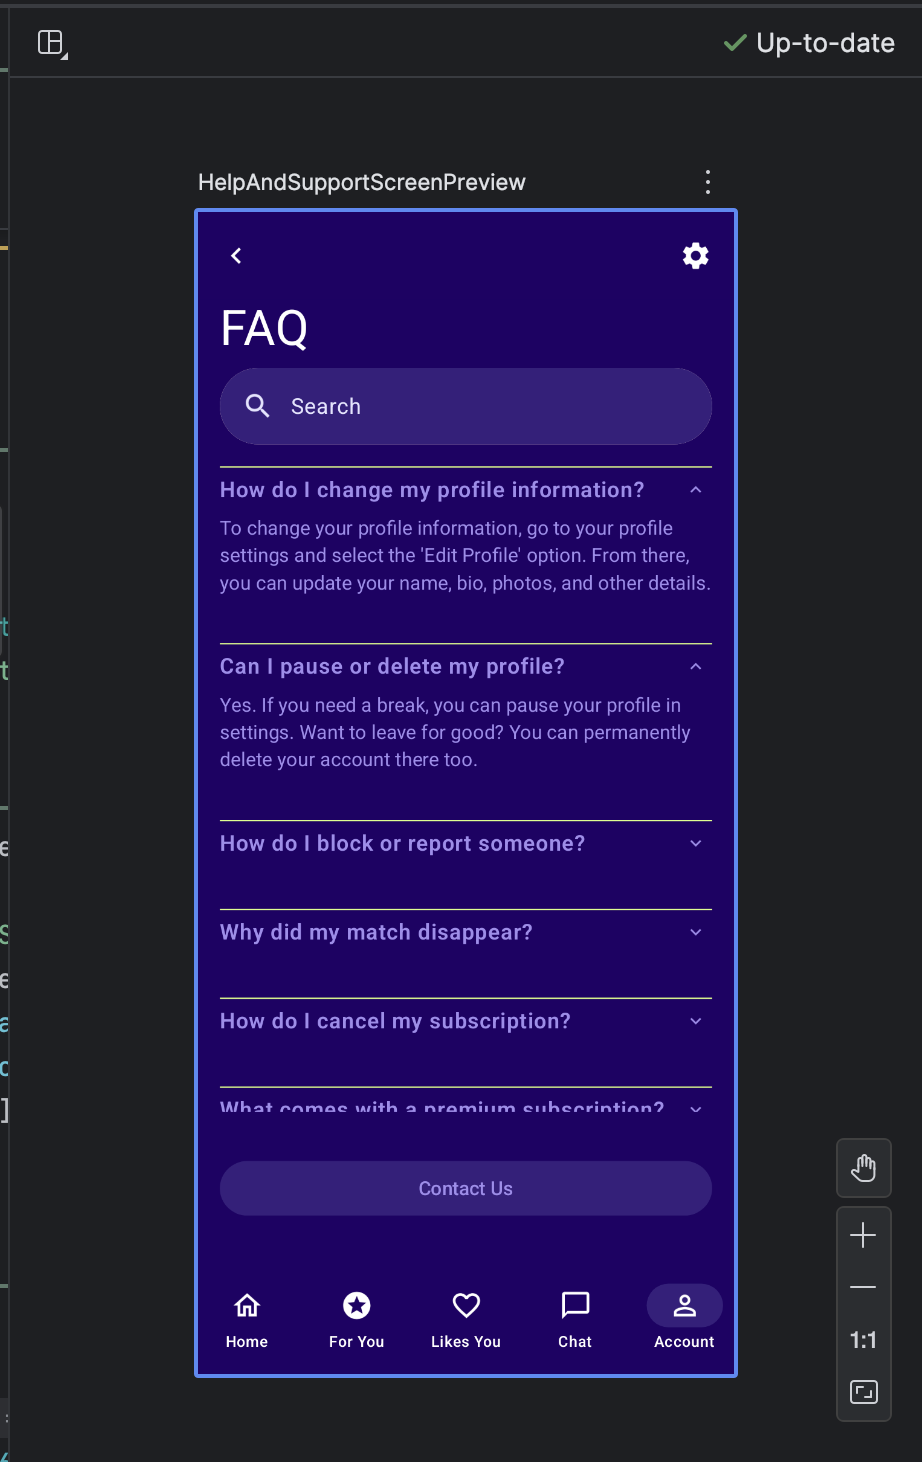
圖 2:在空白的「預覽」面板中,從螢幕截圖生成程式碼。 在聊天欄位中,要求 AI 代理程式生成 UI 程式碼,例如「Generate Jetpack Compose code for the image provided.」(為提供的圖片生成 Jetpack Compose 程式碼)。提交查詢和圖片後,AI 代理程式會建議程式碼,以建立建議的 UI。AI 代理程式通常也會提供 Compose 預覽的程式碼,因此匯入專案後,您就能快速查看 UI 視覺化效果。如果沒有,請要求 AI 代理程式生成 Compose 預覽。
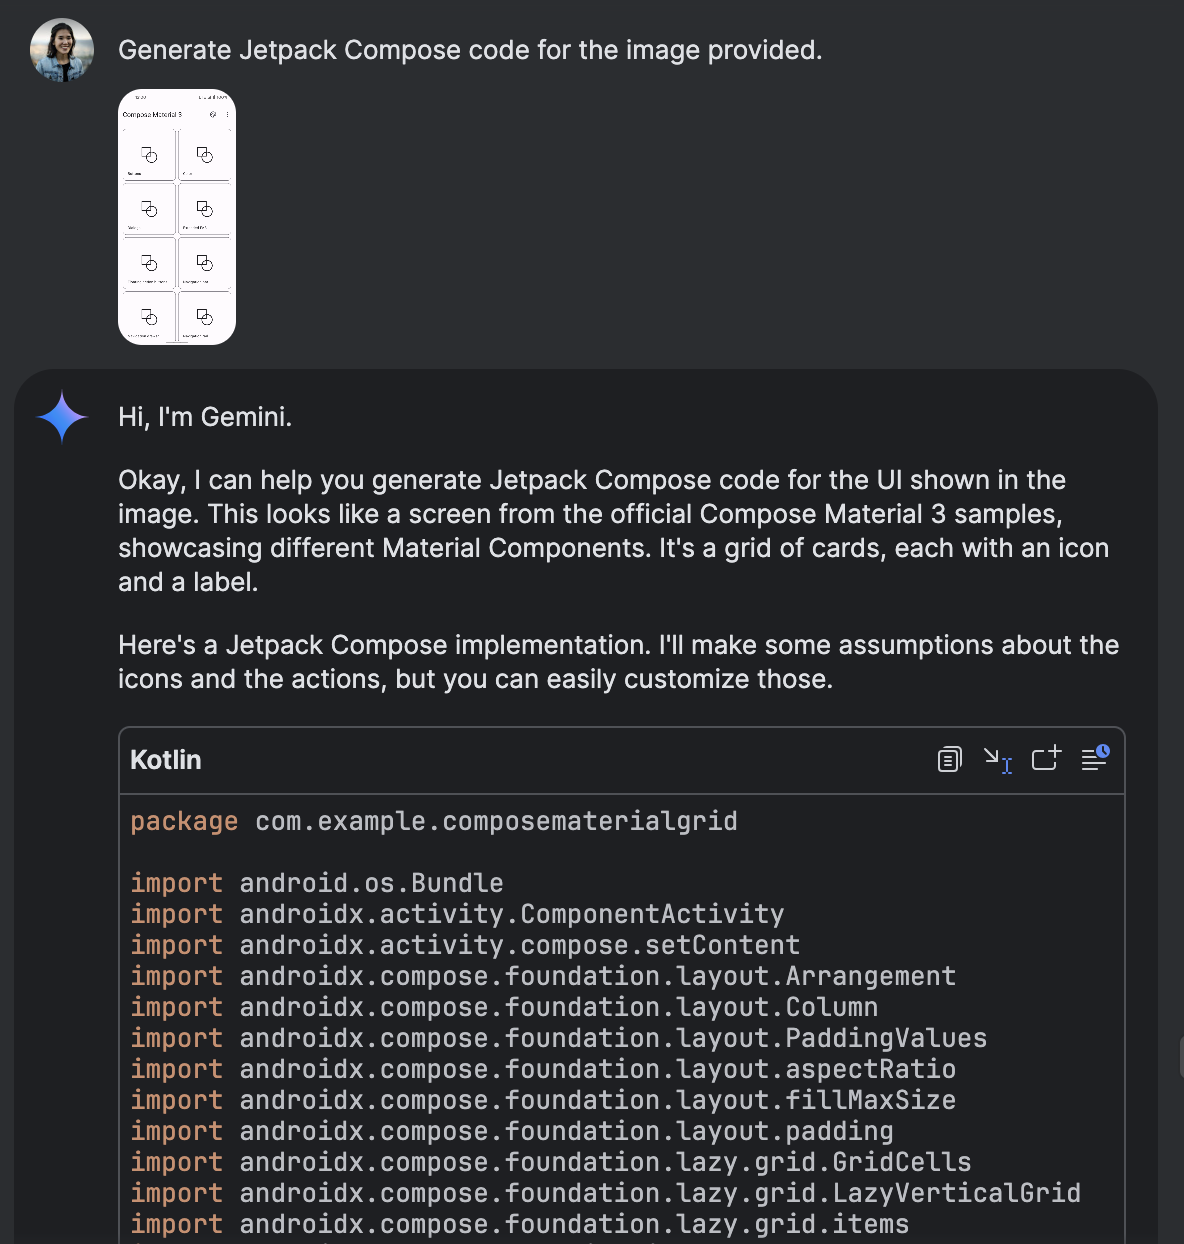
圖 2:Gemini 根據附加圖片生成 Jetpack Compose 程式碼。 匯入程式碼後,您可以在預覽面板中看到 Compose 預覽畫面,直接點選預覽畫面並要求 Gemini 轉換,即可疊代 UI。如果您有想要的圖片,也可以在預覽畫面中按一下滑鼠右鍵,然後依序選取「AI Actions」 >「Match UI to Target Image」,反覆調整 UI。
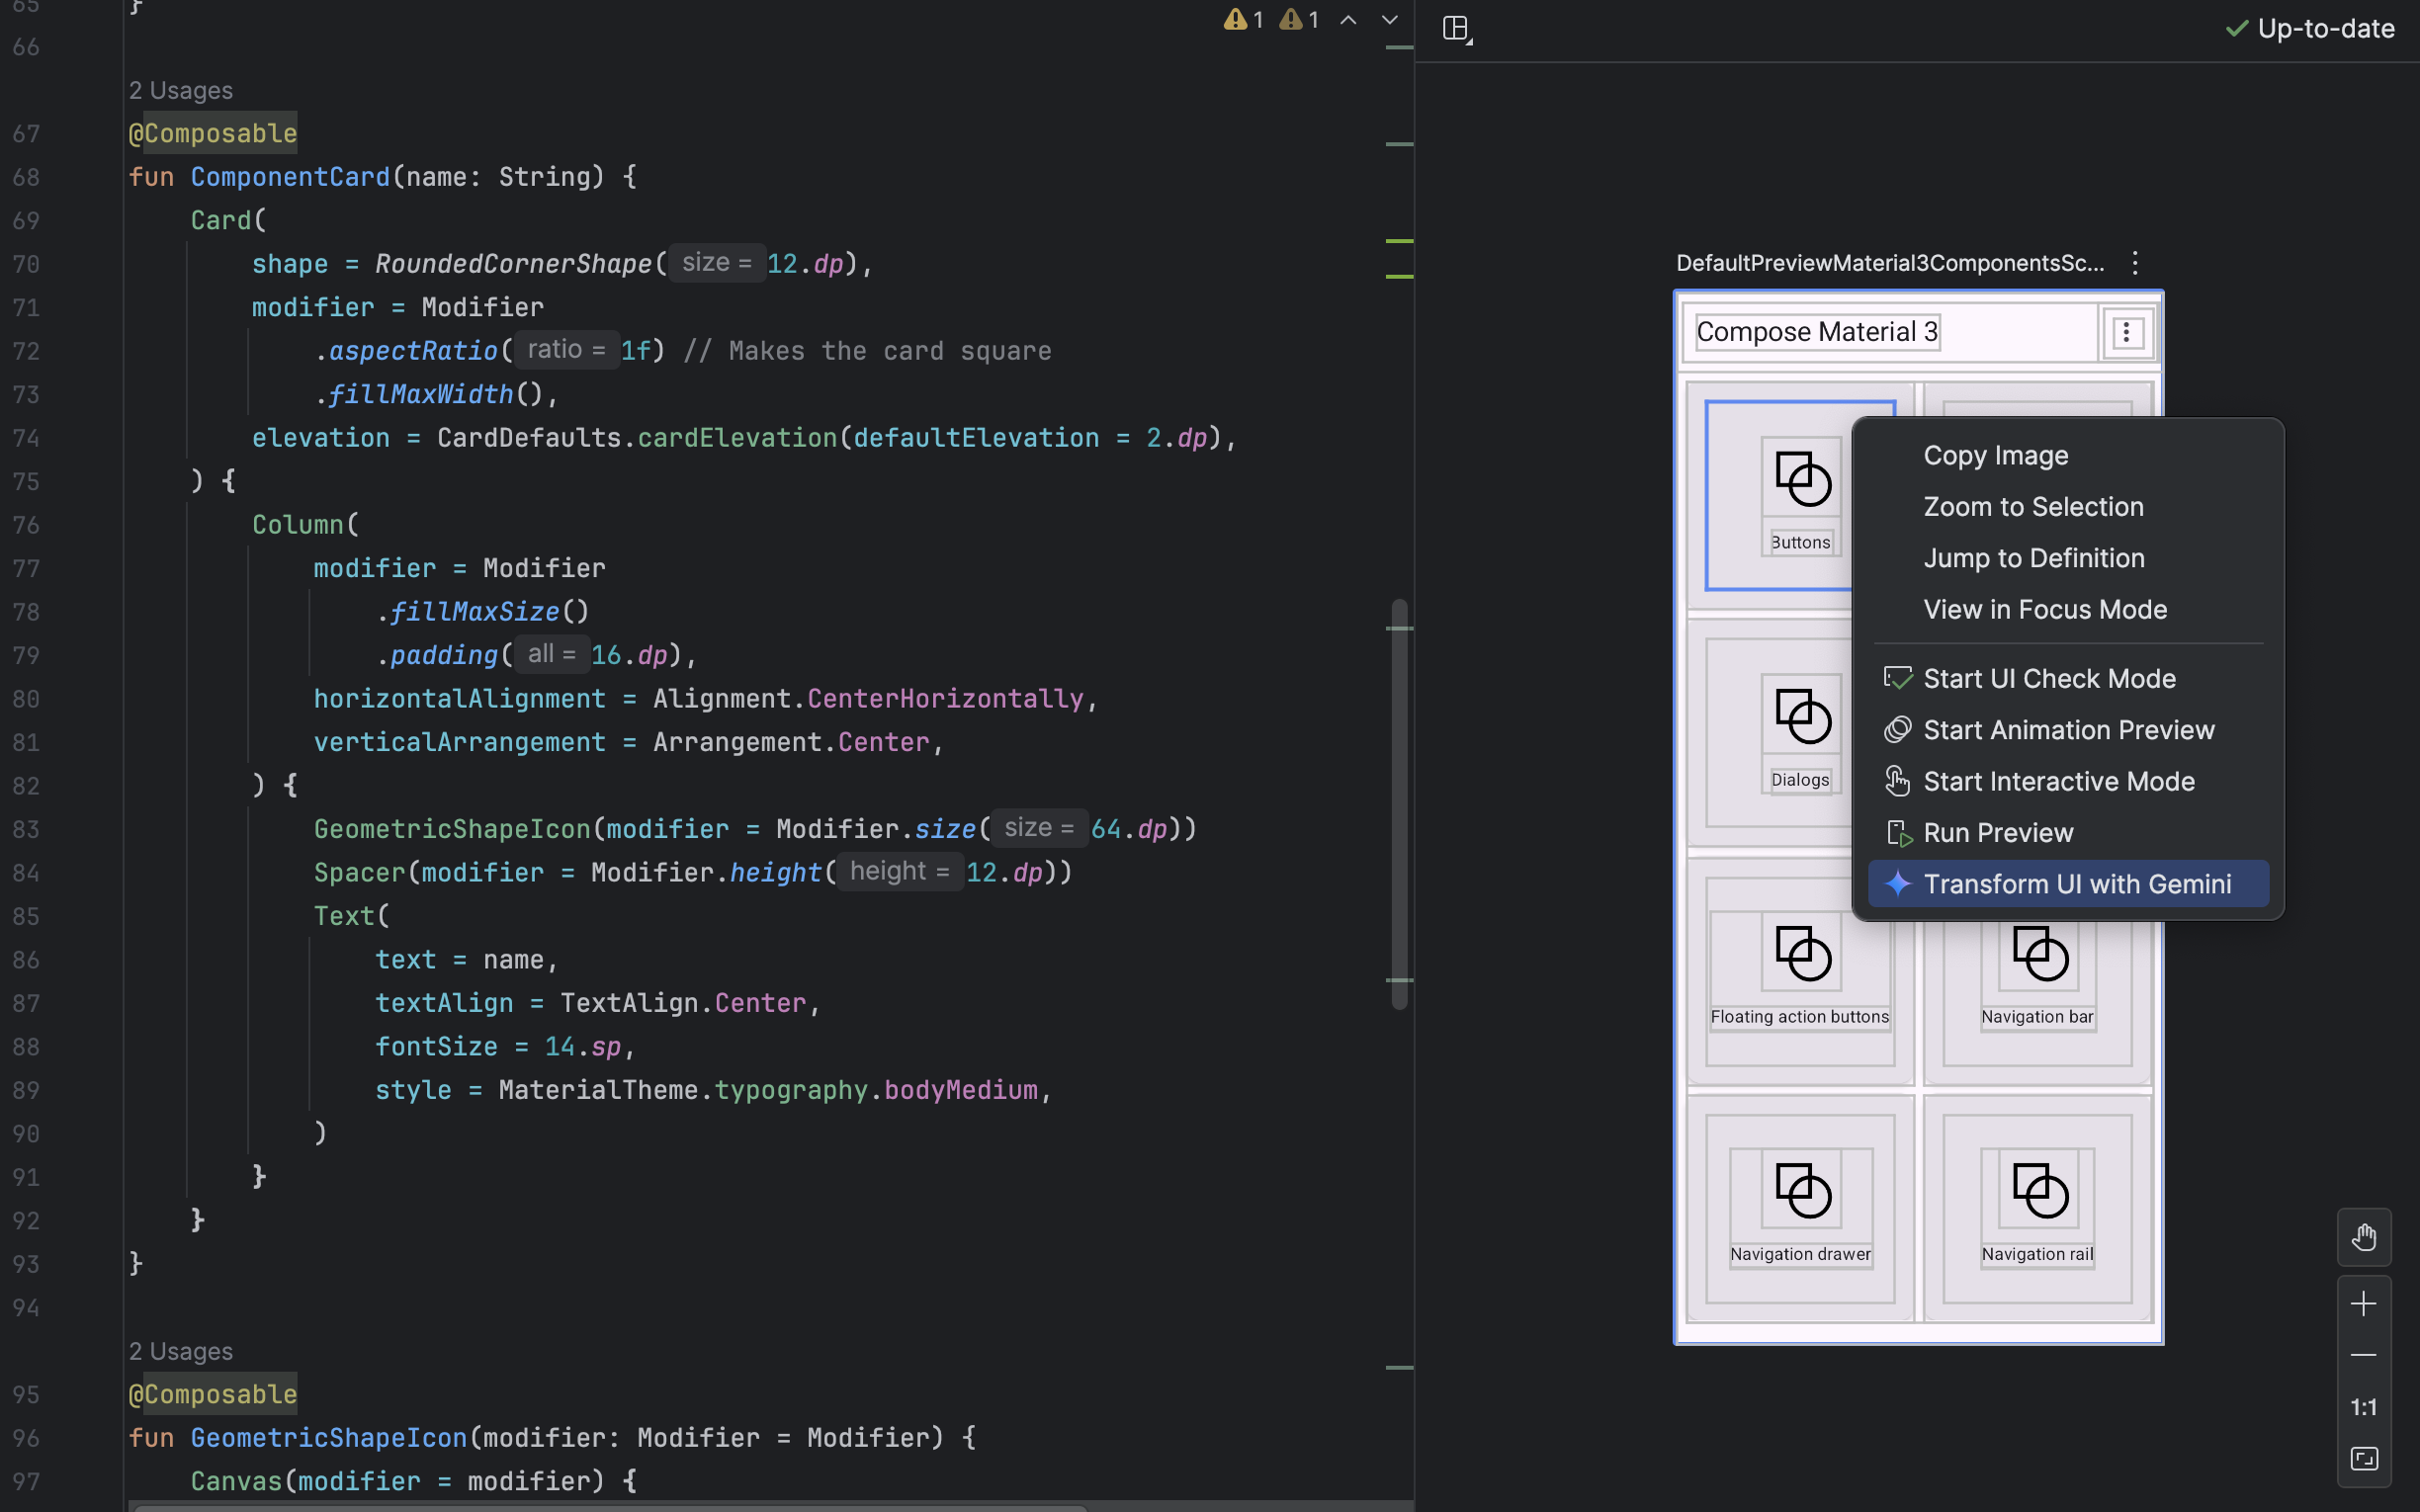
圖 5:使用 Gemini 直接從 Compose 預覽畫面轉換 UI 元素。 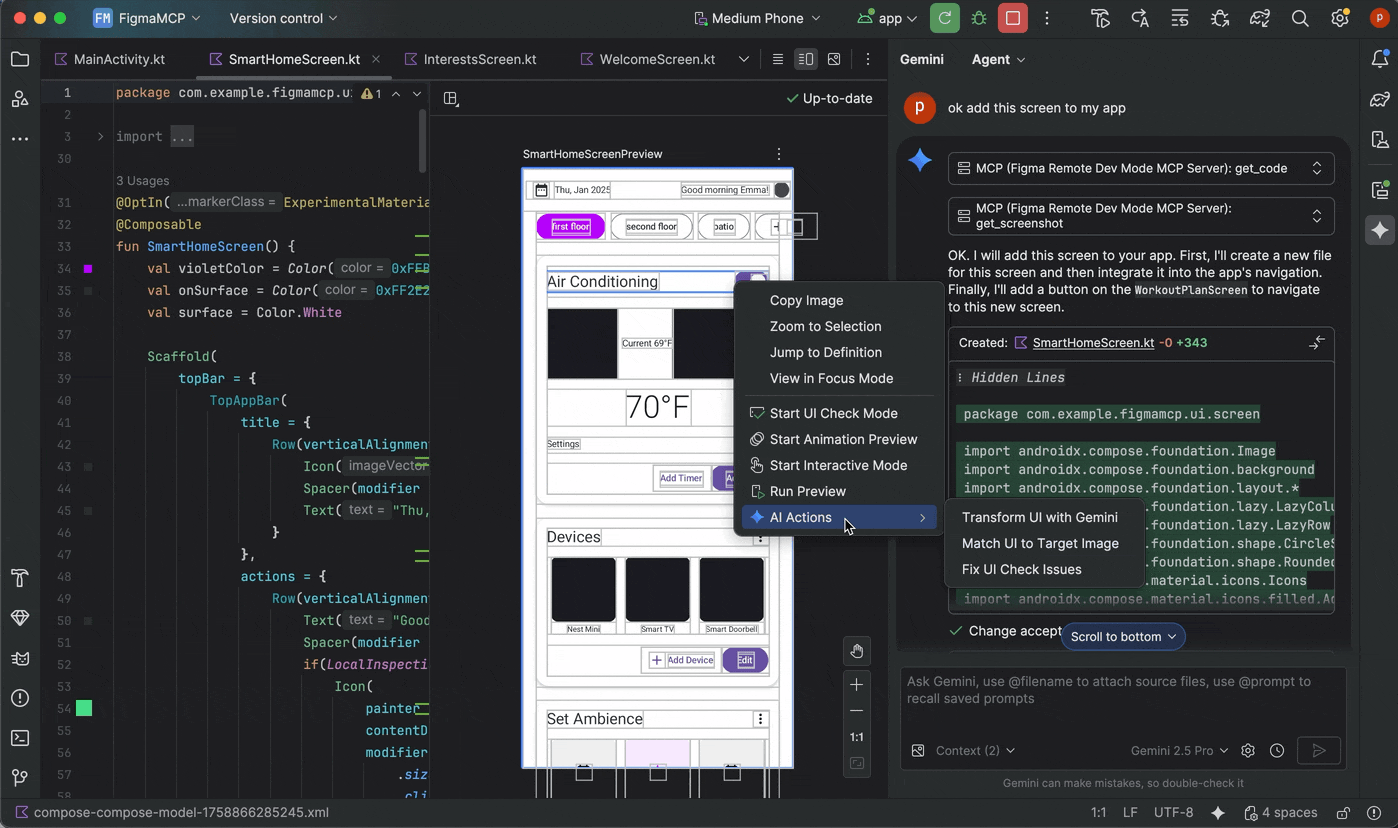
圖 6:使用「比對目標圖片的 UI」的範例
找出並修正 UI 品質問題
AI 代理程式也能協助確保 UI 品質良好且易於存取。 在 Compose 預覽畫面中按一下滑鼠右鍵,然後依序選取「AI Actions」 >「Fix all UI check issues」。 代理程式會稽核 UI 的常見問題 (例如無障礙問題),並建議修正程式碼來解決這些問題。