
The Android XR Emulator is a specialized version of the Android Emulator that is designed for XR app development. It lets you test and debug your XR apps within the familiar environment of Android Studio.
Before you can run your app in the Android XR Emulator, you need to set it up. Create Android Virtual Devices (AVDs) for AI glasses to use with the Android XR Emulator as you test and debug your app. The emulator for AI glasses acts as a separate, virtual device that you can pair with an emulator instance running a phone AVD.
Follow the steps in the following sections to set up everything you need for these virtual devices.
Check system requirements
Before you start creating Android Virtual Devices (AVDs) for AI glasses, review the following system requirements.
- Android Studio: Install the latest Canary build and configure Studio for XR development.
- System: A computer with at least the same specs as what's required for the Android Emulator, except ChromeOS isn't supported. Plan for extra disk space because AI glasses AVDs also require a phone AVD to act as the host device for your app.
Create an Android Virtual Device for AI glasses
Follow these steps to create an AVD for AI glasses that you can use as you test and debug your app:
Open the latest Canary build of Android Studio, and then click Tools > Device Manager > Add a new device

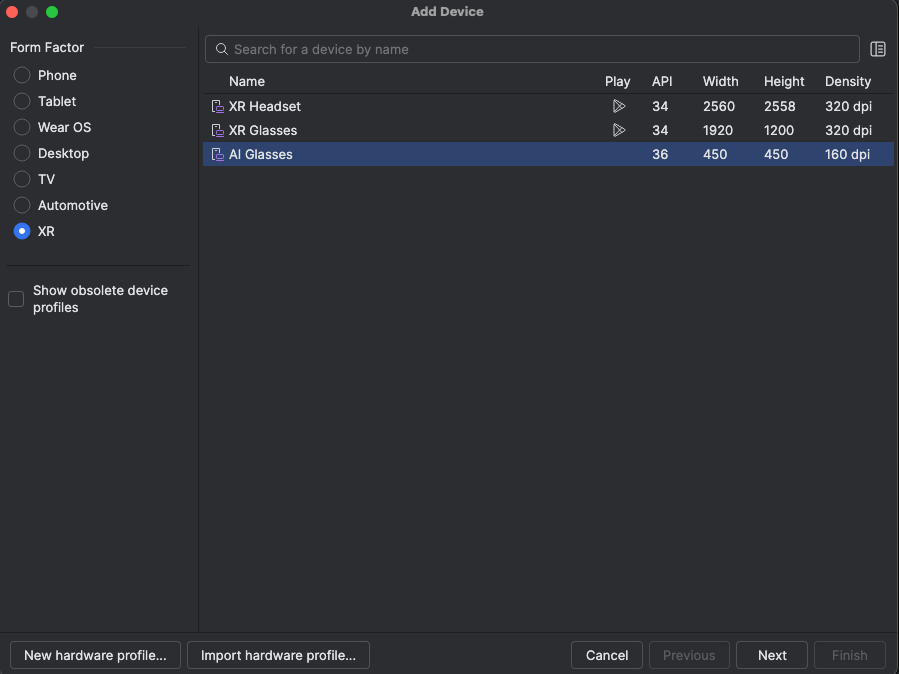
In the Add Device window, in the Form Factor section, select XR.
From the list, select AI Glasses, and then click Next.
In the Configure Virtual Device tab in the Select system image section, select the most-recent AI Glasses system image that is compatible with your system from the list of system images.
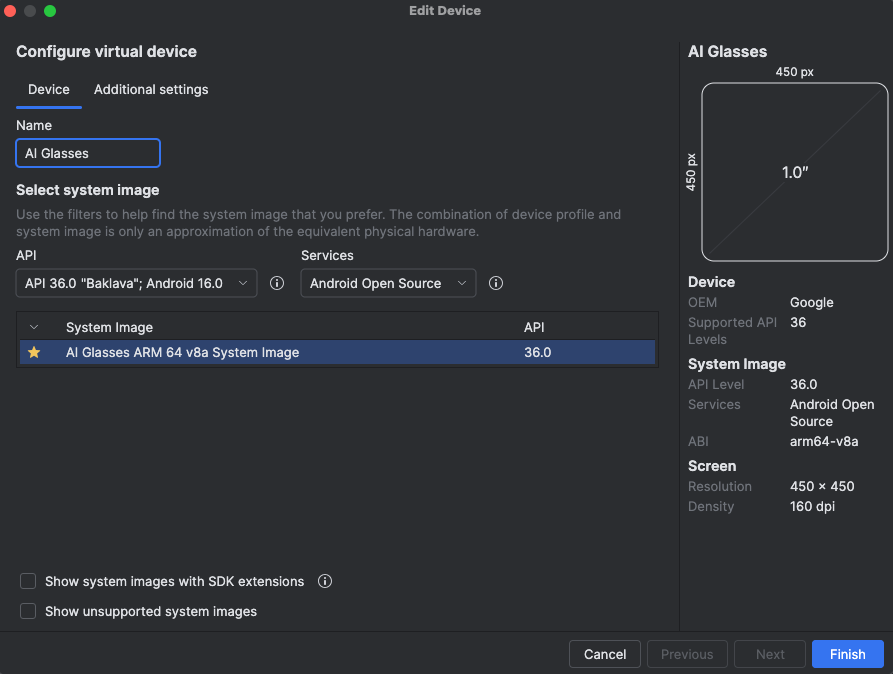
Click Finish, and also click Yes if prompted to download the system image that you selected.

Create a phone AVD to act as the host device
AI glasses AVDs also require a phone AVD to act as the host device for your app. First, create a phone AVD to act as the host device for the AI glasses:
- In Android Studio, return to the Device Manager and click Add a new device
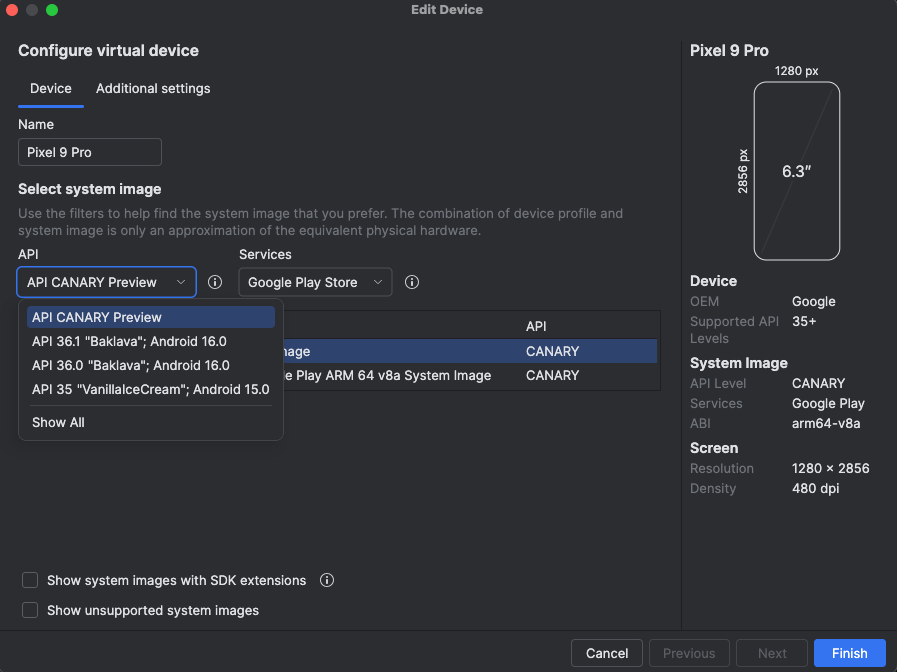
- In the Add Device window, in the Form Factor section, select Phone.
- Select any phone device (this example uses a Pixel 9 Pro), and then click Next.
From the API drop-down menu, select API 37.0 "CinnamonBun; Android 17.0".
In the Select system image section, select the most-recent system image that is compatible with your system from the list of system images:
- Pre-Release 16 KB Page Size Google Play ARM 64 v8a System Image (macOS)
- Pre-Release 16 KB Page Size Google Play Intel x86_64 Atom System Image (Windows and Linux)
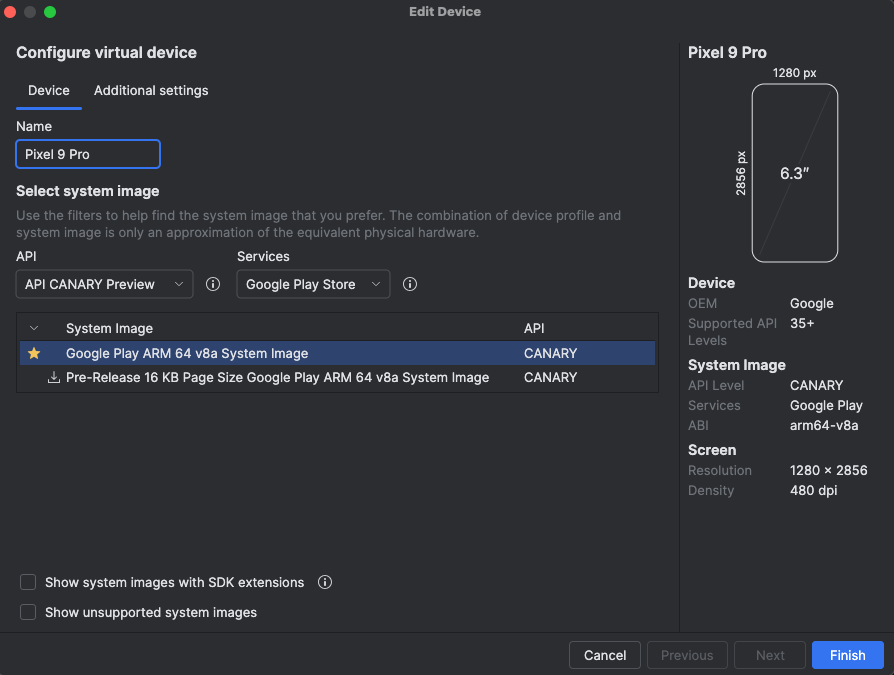
Click Finish, and also click Yes if prompted to download the system image that you selected.
Pair the devices
Finally, pair the devices:
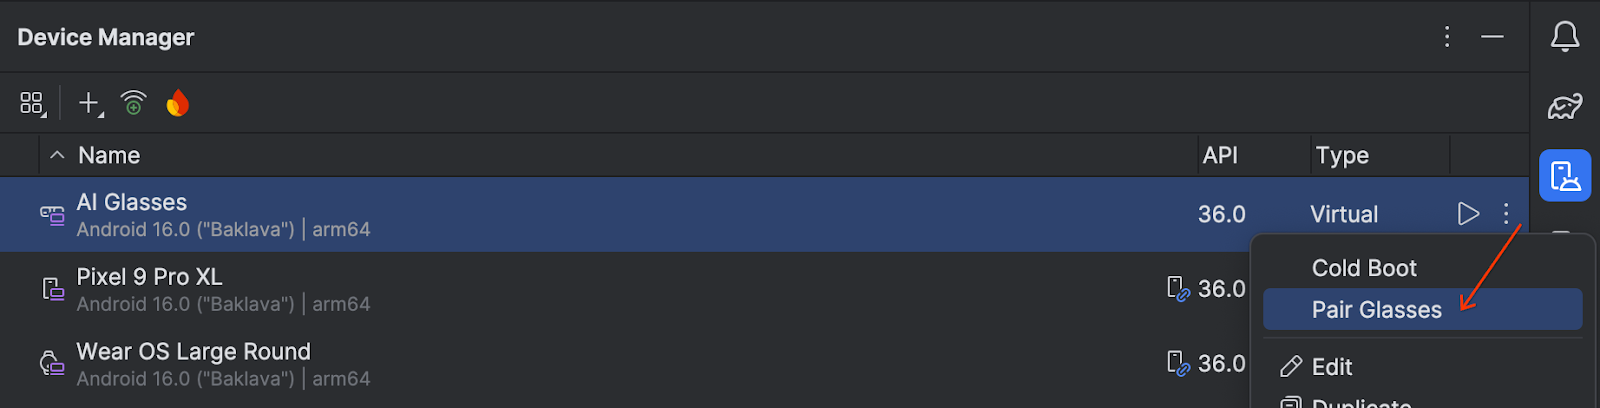
In the Device Manager, find the AI glasses AVD and select Pair Glasses from the overflow menu.
Select the phone AVD from the list of compatible devices.
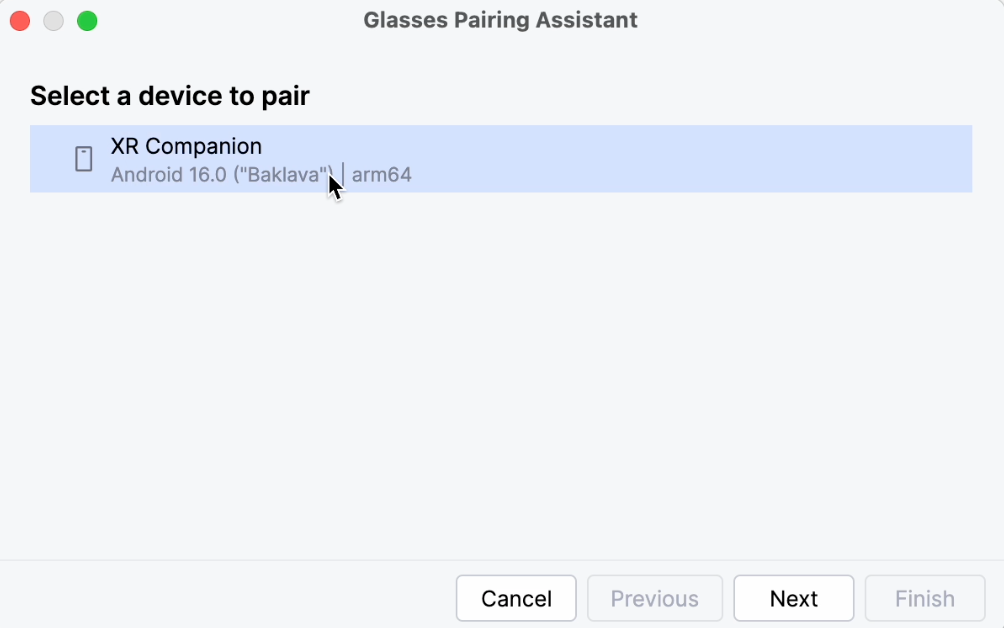
The Pairing Assistant launches both AVDs in the emulator and initiates pairing.
On the phone AVD, accept the permission requests to associate the devices.
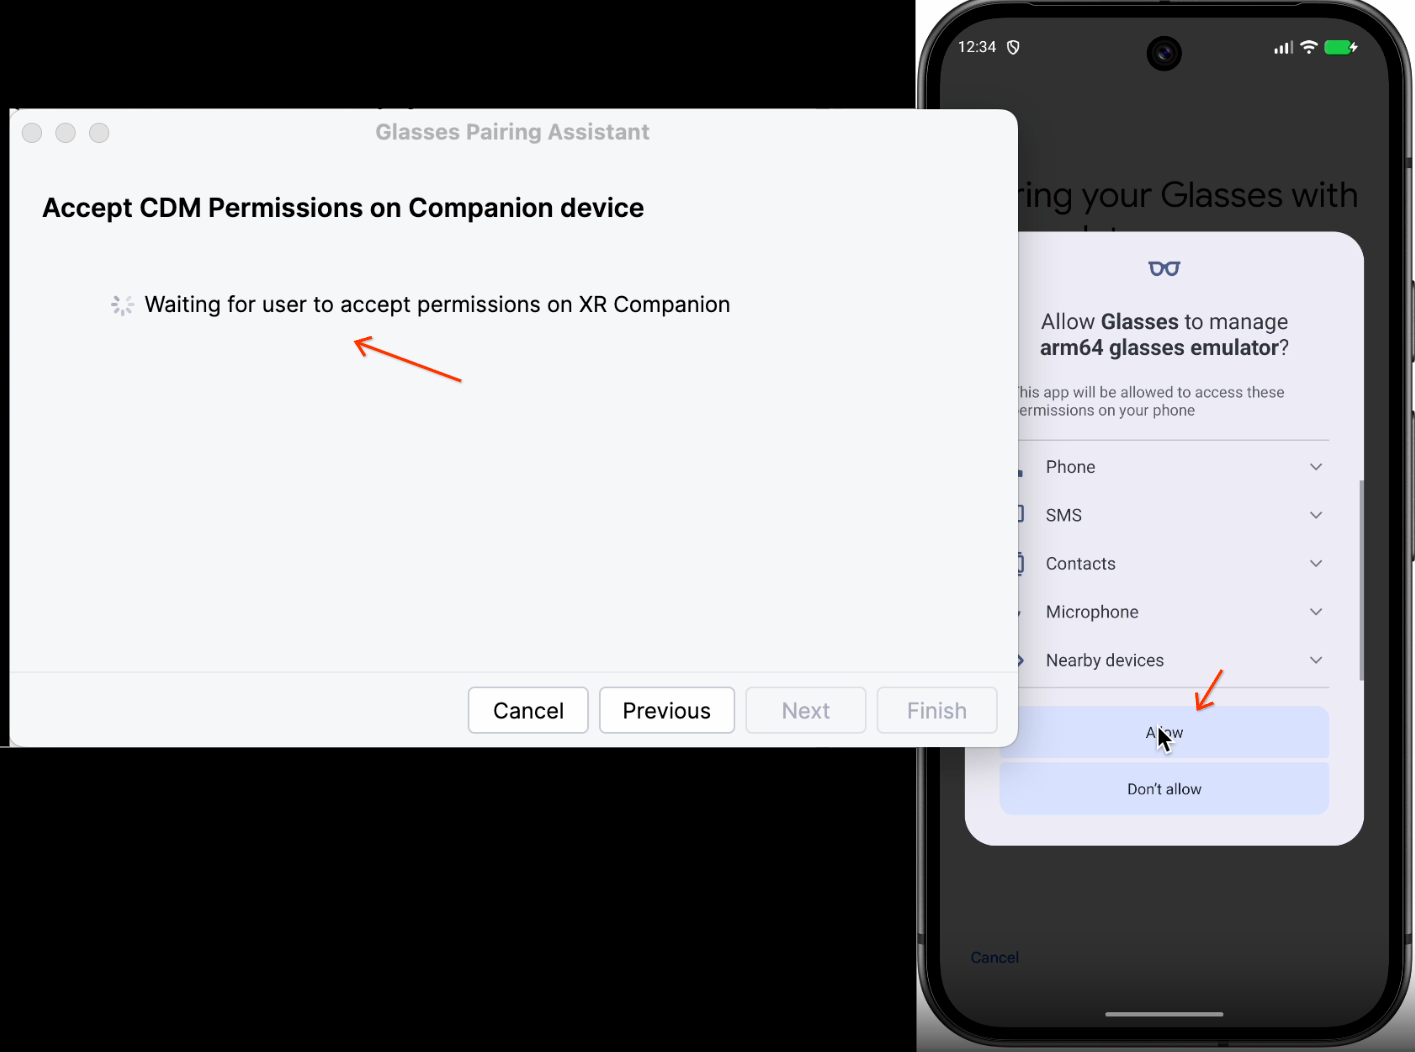
The Pairing Assistant completes pairing.

Next steps
Now that you've created your AVDs for AI glasses, run your app on the AVDs using the emulator.
OpenXR™ and the OpenXR logo are trademarks owned by The Khronos Group Inc. and are registered as a trademark in China, the European Union, Japan and the United Kingdom.