

您可以定義 Grid 容器設定,建立可因應不同螢幕大小和內容類型的彈性版面配置。本頁面說明如何執行下列操作:
- 定義格線:設定資料列和資料欄的基本結構。
- 在格線中放置項目:瞭解項目在格線儲存格中的放置方式,以及如何變更流程方向。
- 管理軌道大小:使用固定、百分比、彈性和內建大小設定軌道大小。
- 設定間隙:管理列和欄之間的「溝槽」。
定義格線
格線由欄和列組成。
Grid 可組合函式具有 config 參數,可接受 lambda 來定義 GridConfigurationScope 內的欄和列。以下範例定義的格線有三列兩欄,每列/欄的大小都以 Dp 指定:
Grid( config = { repeat(2) { column(160.dp) } repeat(3) { row(90.dp) } } ) { }
在格線中放置項目
Grid 會擷取 content lambda 中的 UI 元素,並將其放入格線儲存格。無論您是否明確定義列和欄,格線都會排列項目。根據預設,Grid 會嘗試將 UI 元素放在資料列中可用的格線儲存格;如果無法,則會放在下一列中可用的格線儲存格。如果沒有空白儲存格,Grid 會建立新列。
在下列範例中,格線有六個格線儲存格,且每個儲存格都放置一張資訊卡 (圖 1)。每個格線儲存格為 160dp x 90dp,
因此格線總大小為 320dp x 270dp。
Grid( config = { repeat(2) { column(160.dp) } repeat(3) { row(90.dp) } } ) { Card1() Card2() Card3() Card4() Card5() Card6() }
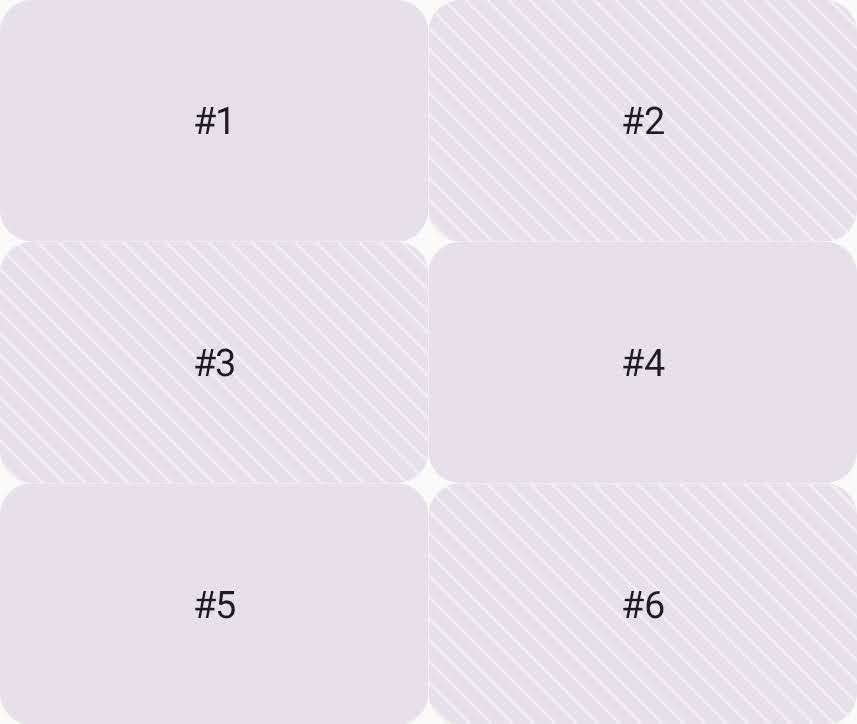
如要將這項預設行為變更為依欄填滿,請將 flow 屬性設為 GridFlow.Column。
Grid( config = { repeat(2) { column(160.dp) } repeat(3) { row(90.dp) } gap(8.dp) flow = GridFlow.Column // Grid tries to place items to fill the column }, ) { Card1() Card2() Card3() Card4() Card5() Card6() }
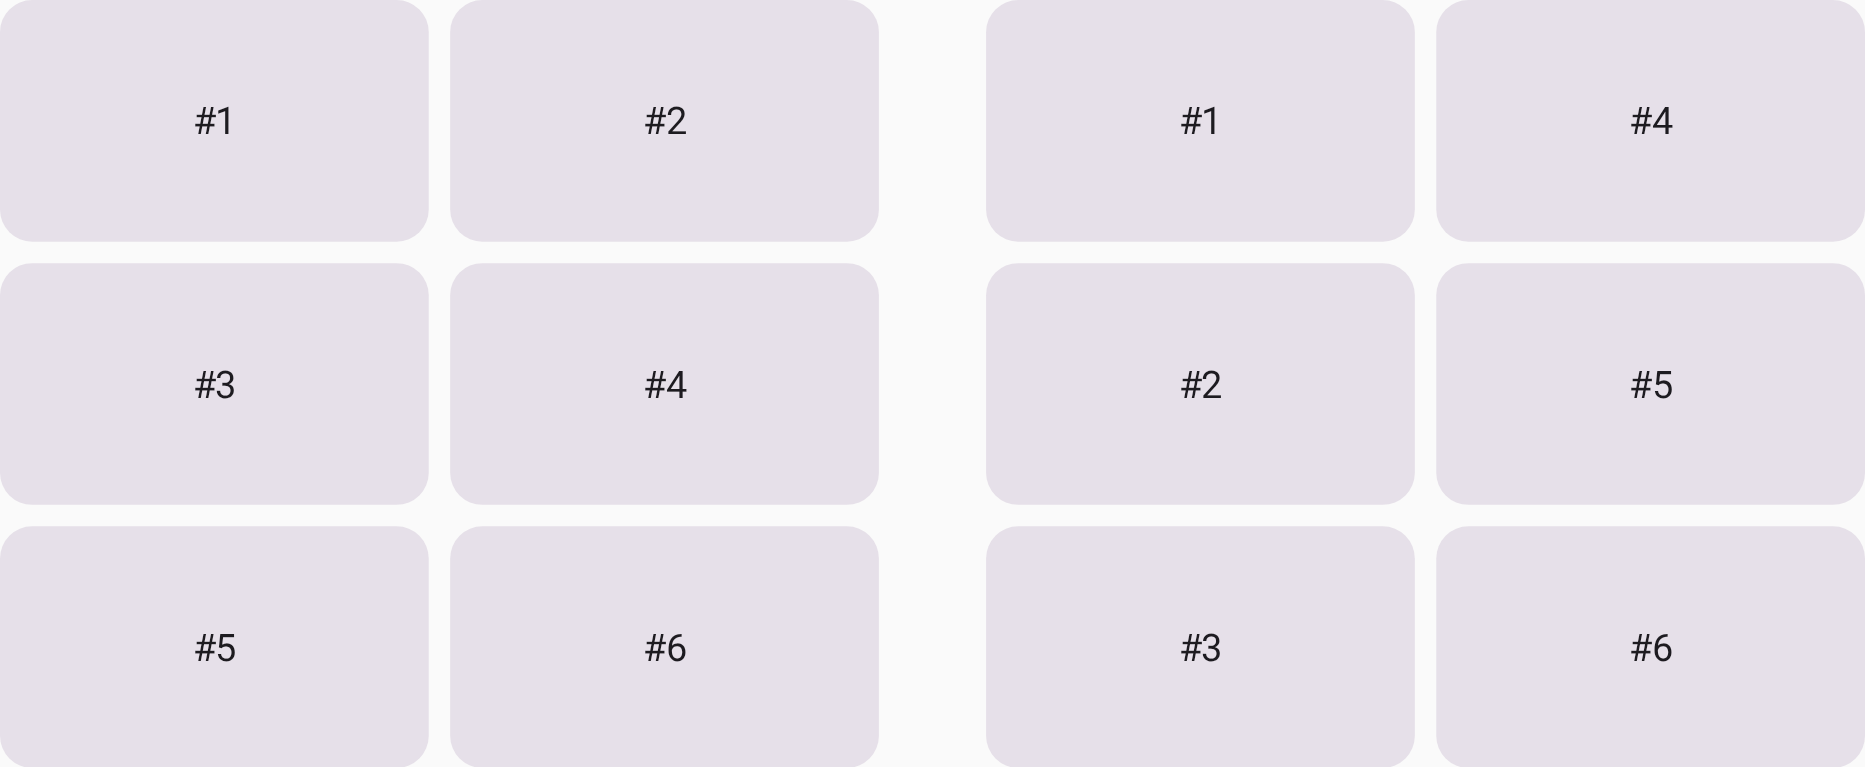
GridFlow.Row (左) 和 GridFlow.Column (右)。
管理軌道大小
資料列和資料欄統稱為「格線軌道」。 你可以使用下列其中一種方法指定格線軌的大小:
- 固定 (
Dp):分配特定大小 (例如column(180.dp))。 - 百分比 (
Float):從0.0f到1.0f分配可用空間總量的百分比 (例如row(0.5f)代表 50%)。 - 彈性 (
Fr):計算固定和百分比軌後,按比例分配剩餘空間。舉例來說,如果兩列分別設為1.fr和3.fr,後者會獲得剩餘高度的 75%。 - 內建:根據軌道內的內容調整軌道大小。詳情請參閱「從本質上決定格線軌大小」。
下列範例使用不同的軌道大小調整選項來定義列高:
Grid( config = { column(1f) row(100.dp) row(0.2f) row(1.fr) row(GridTrackSize.Auto) }, modifier = Modifier.height(480.dp) ) { PastelRedCard("Fixed(100.dp)") PastelGreenCard("Percentage(0.2f)") PastelBlueCard("Flex(1.fr)") PastelYellowCard("Auto") }
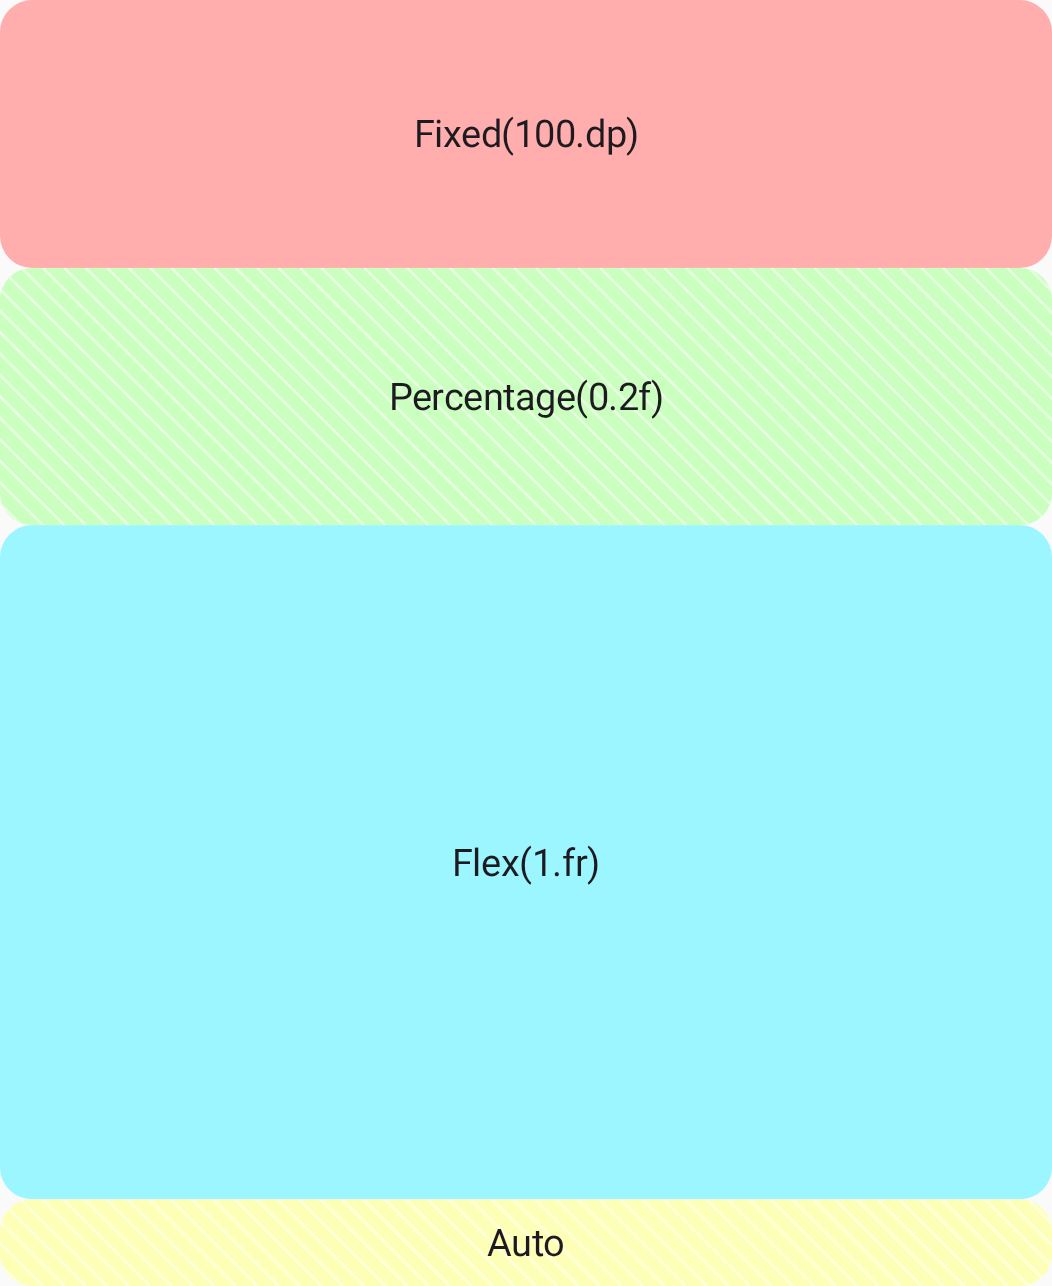
Grid 中的四個主要軌道大小調整選項定義的列高度。
設定彈性格線軌道的最小大小
如果格線容器沒有剩餘空間,標準彈性軌道可以縮小至 0.dp。為避免這種情況,並確保內容不會遭到壓縮,請使用 GridTrackSize.MinMax 強制設定明確的最小尺寸,同時保持軌道的彈性。
以下範例會將至少 100.dp 分配給第一列:
Grid( config = { column(1f) // The first row has a minimum height of 100.dp and can expand to // the half of the remaining space. row(GridTrackSize.MinMax(100.dp, 1.fr)) // The second row takes the half of the remaining space. row(1.fr) // The third row has a fixed height of 200.dp. row(200.dp) }, modifier = Modifier.size(360.dp) // Total grid height is 360.dp ) { PastelRedCard("MinMax(100.dp, 1.fr)") PastelGreenCard("Flex(1.fr)") PastelBlueCard("Fixed(200.dp)") }
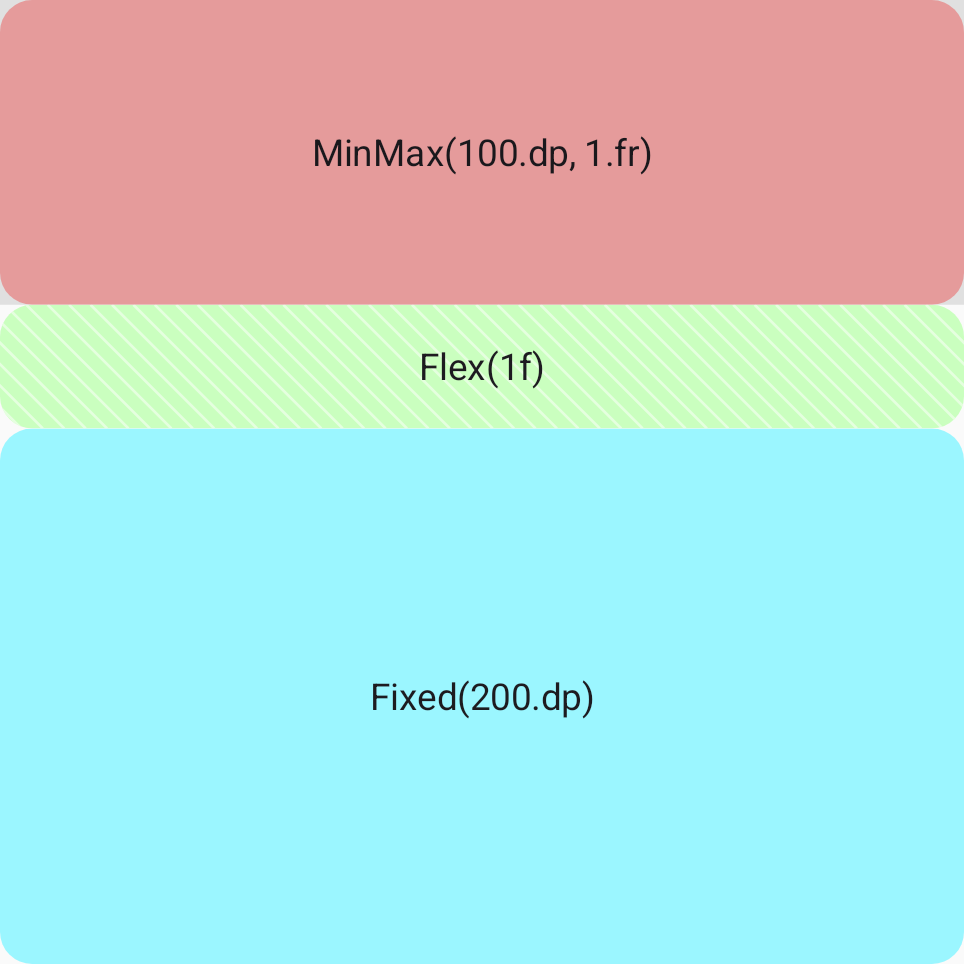
100.dp。
設定放置延遲清單的格線軌道大小下限
標準彈性軌會自動查詢子項的內建大小,以建立基本大小。不過,Jetpack Compose 禁止查詢 SubcomposeLayout 的固有大小,這會支援 LazyColumn 和 LazyRow 等元件。
在標準彈性軌中放置 Lazy 清單會導致 IllegalStateException 損毀。如要在彈性格線軌中安全地放置延遲清單,請使用 MinMax 和明確的最小大小 (例如 0.dp),略過內建的測量傳遞。
Grid( config = { column(1f) // The first row's height is determined by the height of the Text composable. row(GridTrackSize.Auto) // The second row occupies the remaining space, allowing the LazyColumn to scroll. row(GridTrackSize.MinMax(0.dp, 1.fr)) gap(8.dp) }, modifier = Modifier.size(width = 170.dp, height = 240.dp) ) { Text("LazyColumn in a Grid") // The LazyColumn is placed in the second row, filling the remaining space. LazyColumn(verticalArrangement = Arrangement.spacedBy(4.dp)) { items(100) { number -> PastelGreenCard("Card $number") } } }
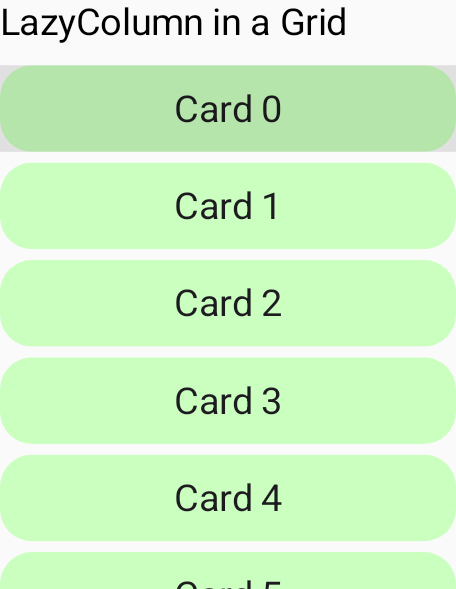
LazyColumn 格狀空間儲存格中。
從本質上決定格線軌道大小
如要讓版面配置配合內容調整大小,而不是強制放入固定容器,可以對 Grid 使用內建大小。格線軌道大小由下列值決定:
GridTrackSize.MaxContent:使用內容的最大內在大小 (例如,寬度取決於文字方塊中沒有換行的文字完整長度)。GridTrackSize.MinContent:使用內容的最小內建大小 (例如,寬度取決於文字區塊中最長的單一字詞)。GridTrackSize.Auto:根據可用空間調整軌道大小。根據預設,這個元素的行為與MaxContent類似,但會縮小並換行顯示內容,以配合父項容器大小。
以下範例會並排放置兩段文字。 第一個文字的欄大小取決於顯示文字所需的最小寬度,第二個欄的寬度則取決於文字所需的最大寬度。
Grid( config = { column(GridTrackSize.MinContent) column(GridTrackSize.MaxContent) row(1.0f) }, modifier = Modifier.width(480.dp) ) { Text("Lorem ipsum dolor sit amet, consectetur adipiscing elit. Cras imperdiet.") Text("Lorem ipsum dolor sit amet, consectetur adipiscing elit. Cras imperdiet.") }
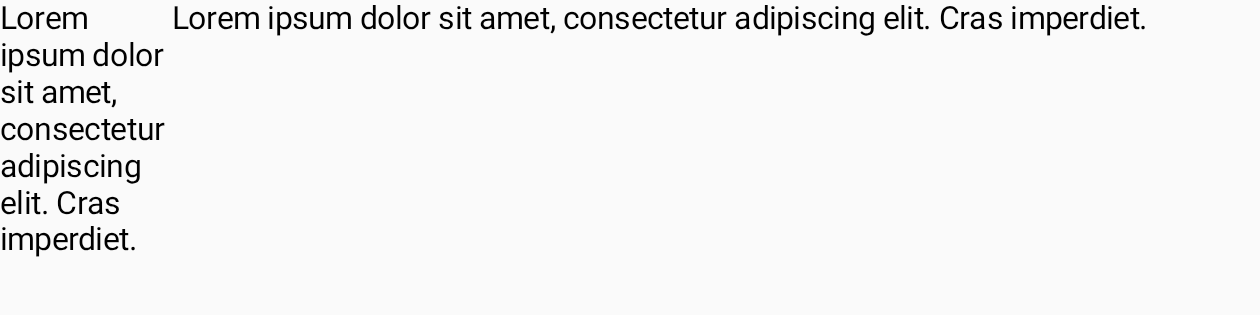
設定列和欄之間的間距
格線軌道大小設定完成後,即可修改格線間距,調整軌道間的間距。您可以使用 columnGap 函式指定欄間距,並使用 rowGap 指定列間距。在以下範例中,每列之間有 16dp 間距,每欄之間有 8dp 間距 (圖 5)。
Grid( config = { repeat(2) { column(160.dp) } repeat(3) { row(90.dp) } rowGap(16.dp) columnGap(8.dp) } ) { Card1() Card2() Card3() Card4() Card5() Card6() }
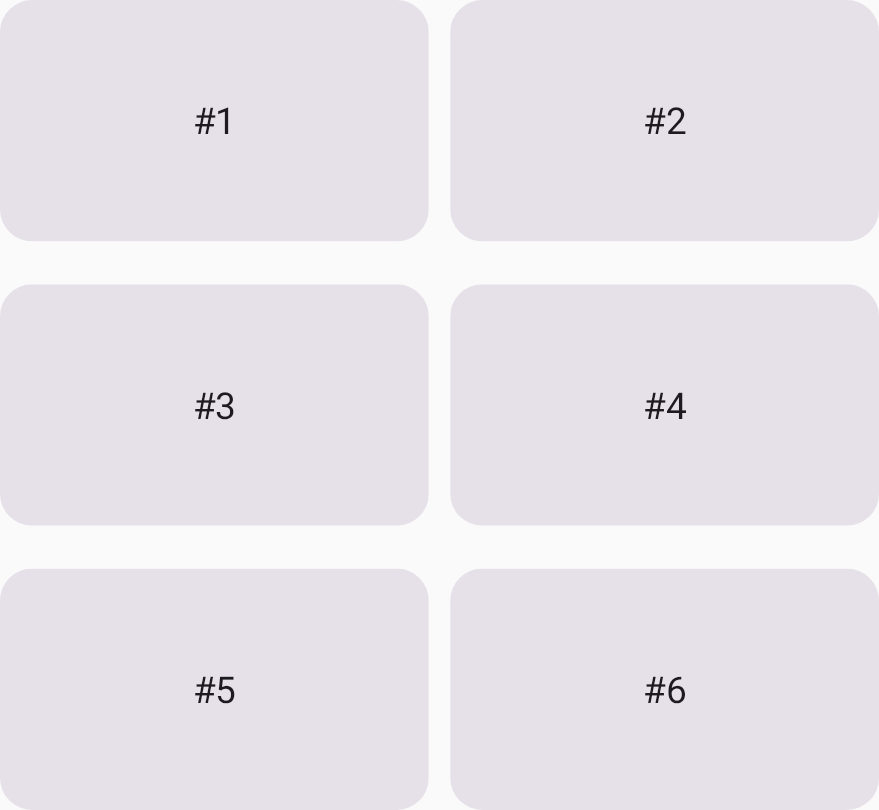
您也可以使用便利函式 gap 定義相同欄和列大小的間距,以及使用單一函式分別定義欄和間距大小。下列程式碼會在格線中加入 8dp 間距:
Grid( config = { repeat(2) { column(160.dp) } repeat(3) { row(90.dp) } gap(8.dp) // Equivalent to columnGap(8.dp) and rowGap(8.dp) } ) { Card1() Card2() Card3() Card4() Card5() Card6() }
使用命名區域定義格線區域
命名區域可讓您為格線儲存格群組附加名稱,這些群組稱為「格線區域」。在格線中放置 UI 元素時,您可以使用這些名稱,而非座標索引。
使用具名區域有兩大好處,可提升程式碼可讀性:
- 定義格線版面配置時,預期內容的用途和位置一目瞭然。
- 新增內容時,清楚說明內容用途。
如要清楚整理複雜的版面配置,您可以定義語意格線區域,將實體格線結構與子項位置分開。
在 config lambda 中,使用 GridConfigurationScope 中的 area 函式,在格線中註冊已命名的區域。然後,您可以使用 gridItem 修飾符和對應的區域 ID,將子項可組合函式指派給這些區域。area 函式會將語意 ID (例如 enum 類別值或字串鍵) 對應至一組實體格線座標。格線和索引是以 1 為基準
(也就是說,第一列是 1,第一欄是 1)。
舉例來說,您定義的格線有四個區域 ID:
/** * An enum representing the IDs for named areas within the grid. */ enum class GridAreaNames { Area1, Area2, Area3, Area4 }
使用 areaId 參數提供區域名稱,以及區域的儲存格座標和範圍。gridItem 修飾符會使用 areaId 做為鍵,將每個子項指派至指定的格線區域,如下列範例所示:
Grid( config = { // Define a single column that takes all available width. repeat(2) { column(0.5f) } // Define four rows, each taking 25% of the total height. repeat(4) { row(0.25f) } // Define named grid areas by associating an areaId with specific row and column indices. // Row and column indices are 1-based. area(areaId = GridAreaNames.Area1, row = 1, column = 1, columnSpan = 2) area(areaId = GridAreaNames.Area2, row = 2, column = 1, rowSpan = 3) area(areaId = GridAreaNames.Area3, rows = 2..3, columns = 2..2) area(areaId = GridAreaNames.Area4, row = 4, column = 2) gap(4.dp) }, modifier = Modifier.size(360.dp) ) { PastelRedCard( "Area 1", // Use Modifier.gridItem(areaId) to place this composable into the // grid area defined with the matching ID in the config block. modifier = Modifier.gridItem(areaId = GridAreaNames.Area1) ) PastelGreenCard( "Area 2", modifier = Modifier.gridItem(areaId = GridAreaNames.Area2) ) PastelBlueCard( "Area 3", modifier = Modifier.gridItem(areaId = GridAreaNames.Area3) ) PastelYellowCard( "Area 4", modifier = Modifier.gridItem(areaId = GridAreaNames.Area4) ) }
使用具名區域時,您可以在 config lambda 中重組或調整實體版面格線 (例如變更列、欄或軌道大小),不必修改子項可組合函式的順序或參數。